Common Sewing tips-how to assemble a PDF sewing pattern
Hello! I am so happy you are here to learn how to sew in the way that is easy, green, modern and fun with Common Sewing’s New Basics Beginner’s Series! All of our patterns will be emailed to you in a printable PDF format. You can print your patterns in black and white on your home printer. They do take a bit of assembling, so let’s do a quick how-to and get you started. And fun fact, once we have led you through your 6 projects, once your confidence is high and your hunger to make stuff needs more things … you will have a huge selection of online patterns that are all accessed and assembled in the same way. This is your first step toward that creative freedom! Let’s begin.
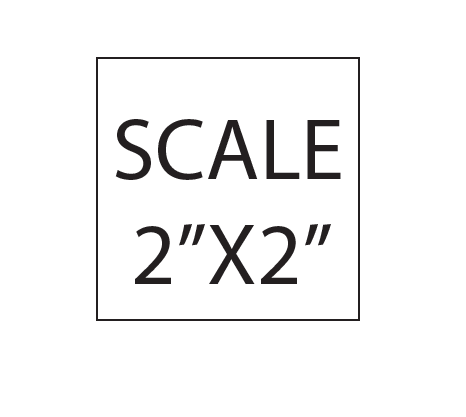
First step - your supplies. To assemble a pdf pattern you will need a couple rolls of clear tape and your printed pdf pattern. Download your pattern and place it into a file where you can find it easily. I keep a Common Sewing file on my desktop. Two things to learn before you print all of your pages: set your printer to actual size or 100% (not fit to page) and print only the first page to start so you can check the size. Each pattern will begin with a scale box. Make sure that your box measures at exactly 2” before you continue.
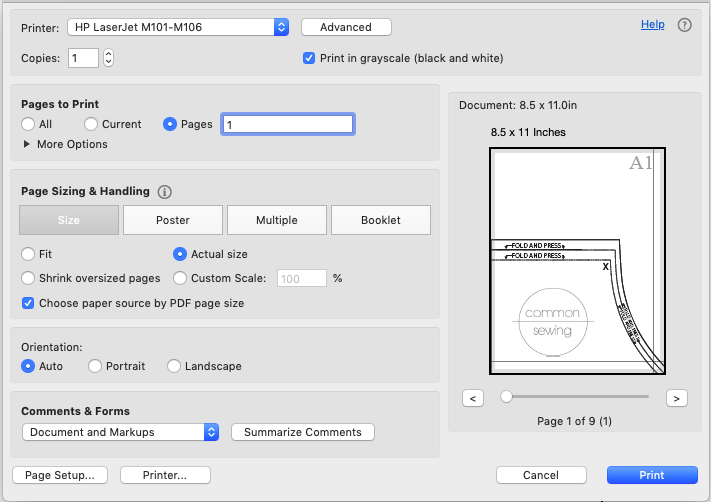
Once you have confirmed that your size is correct, print the rest of your pages.
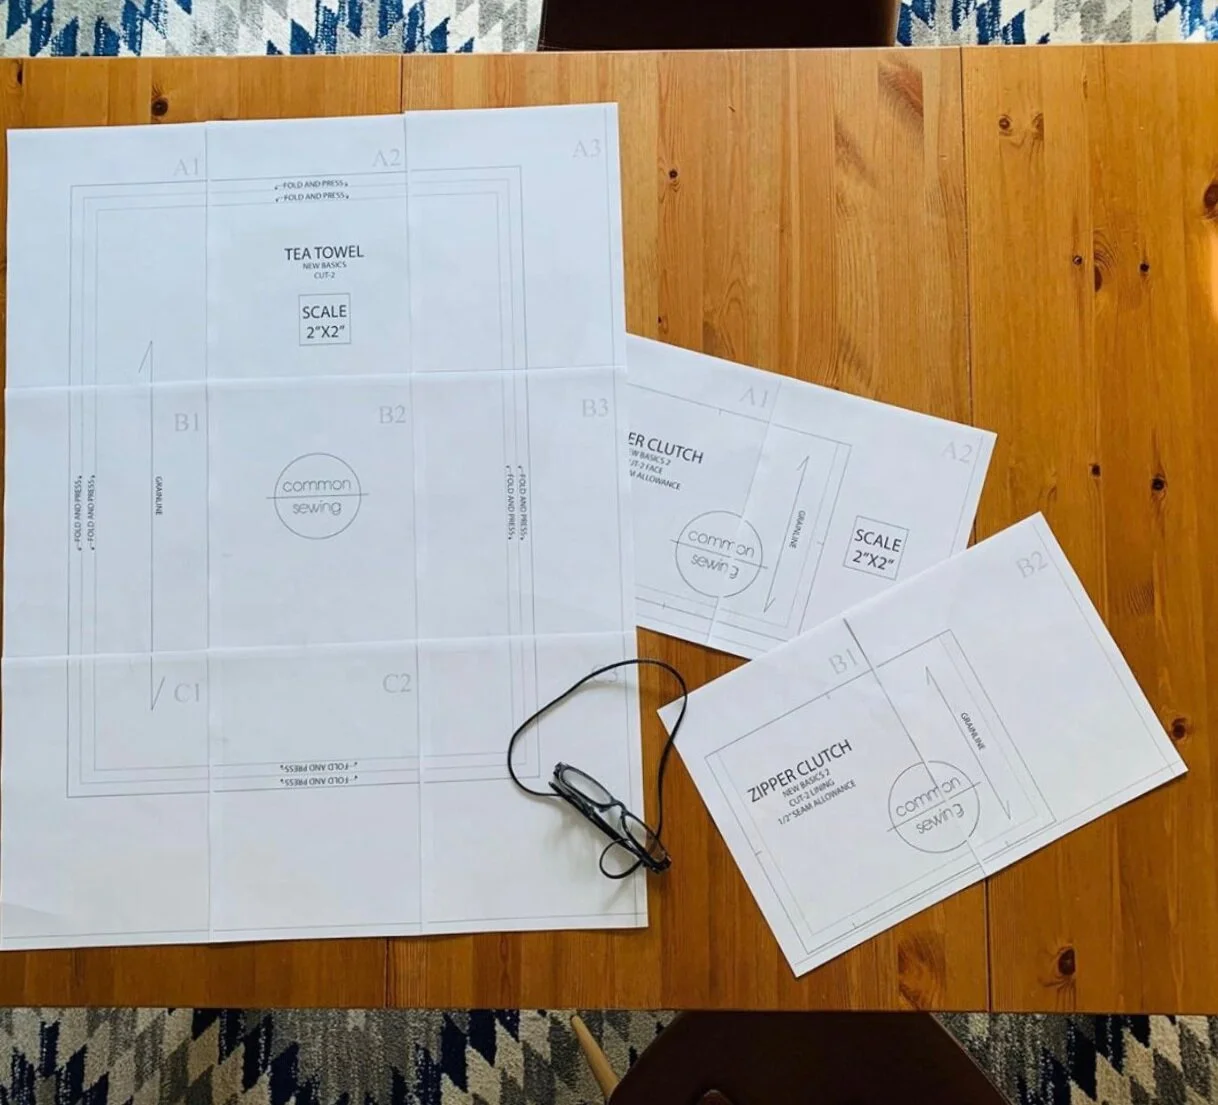
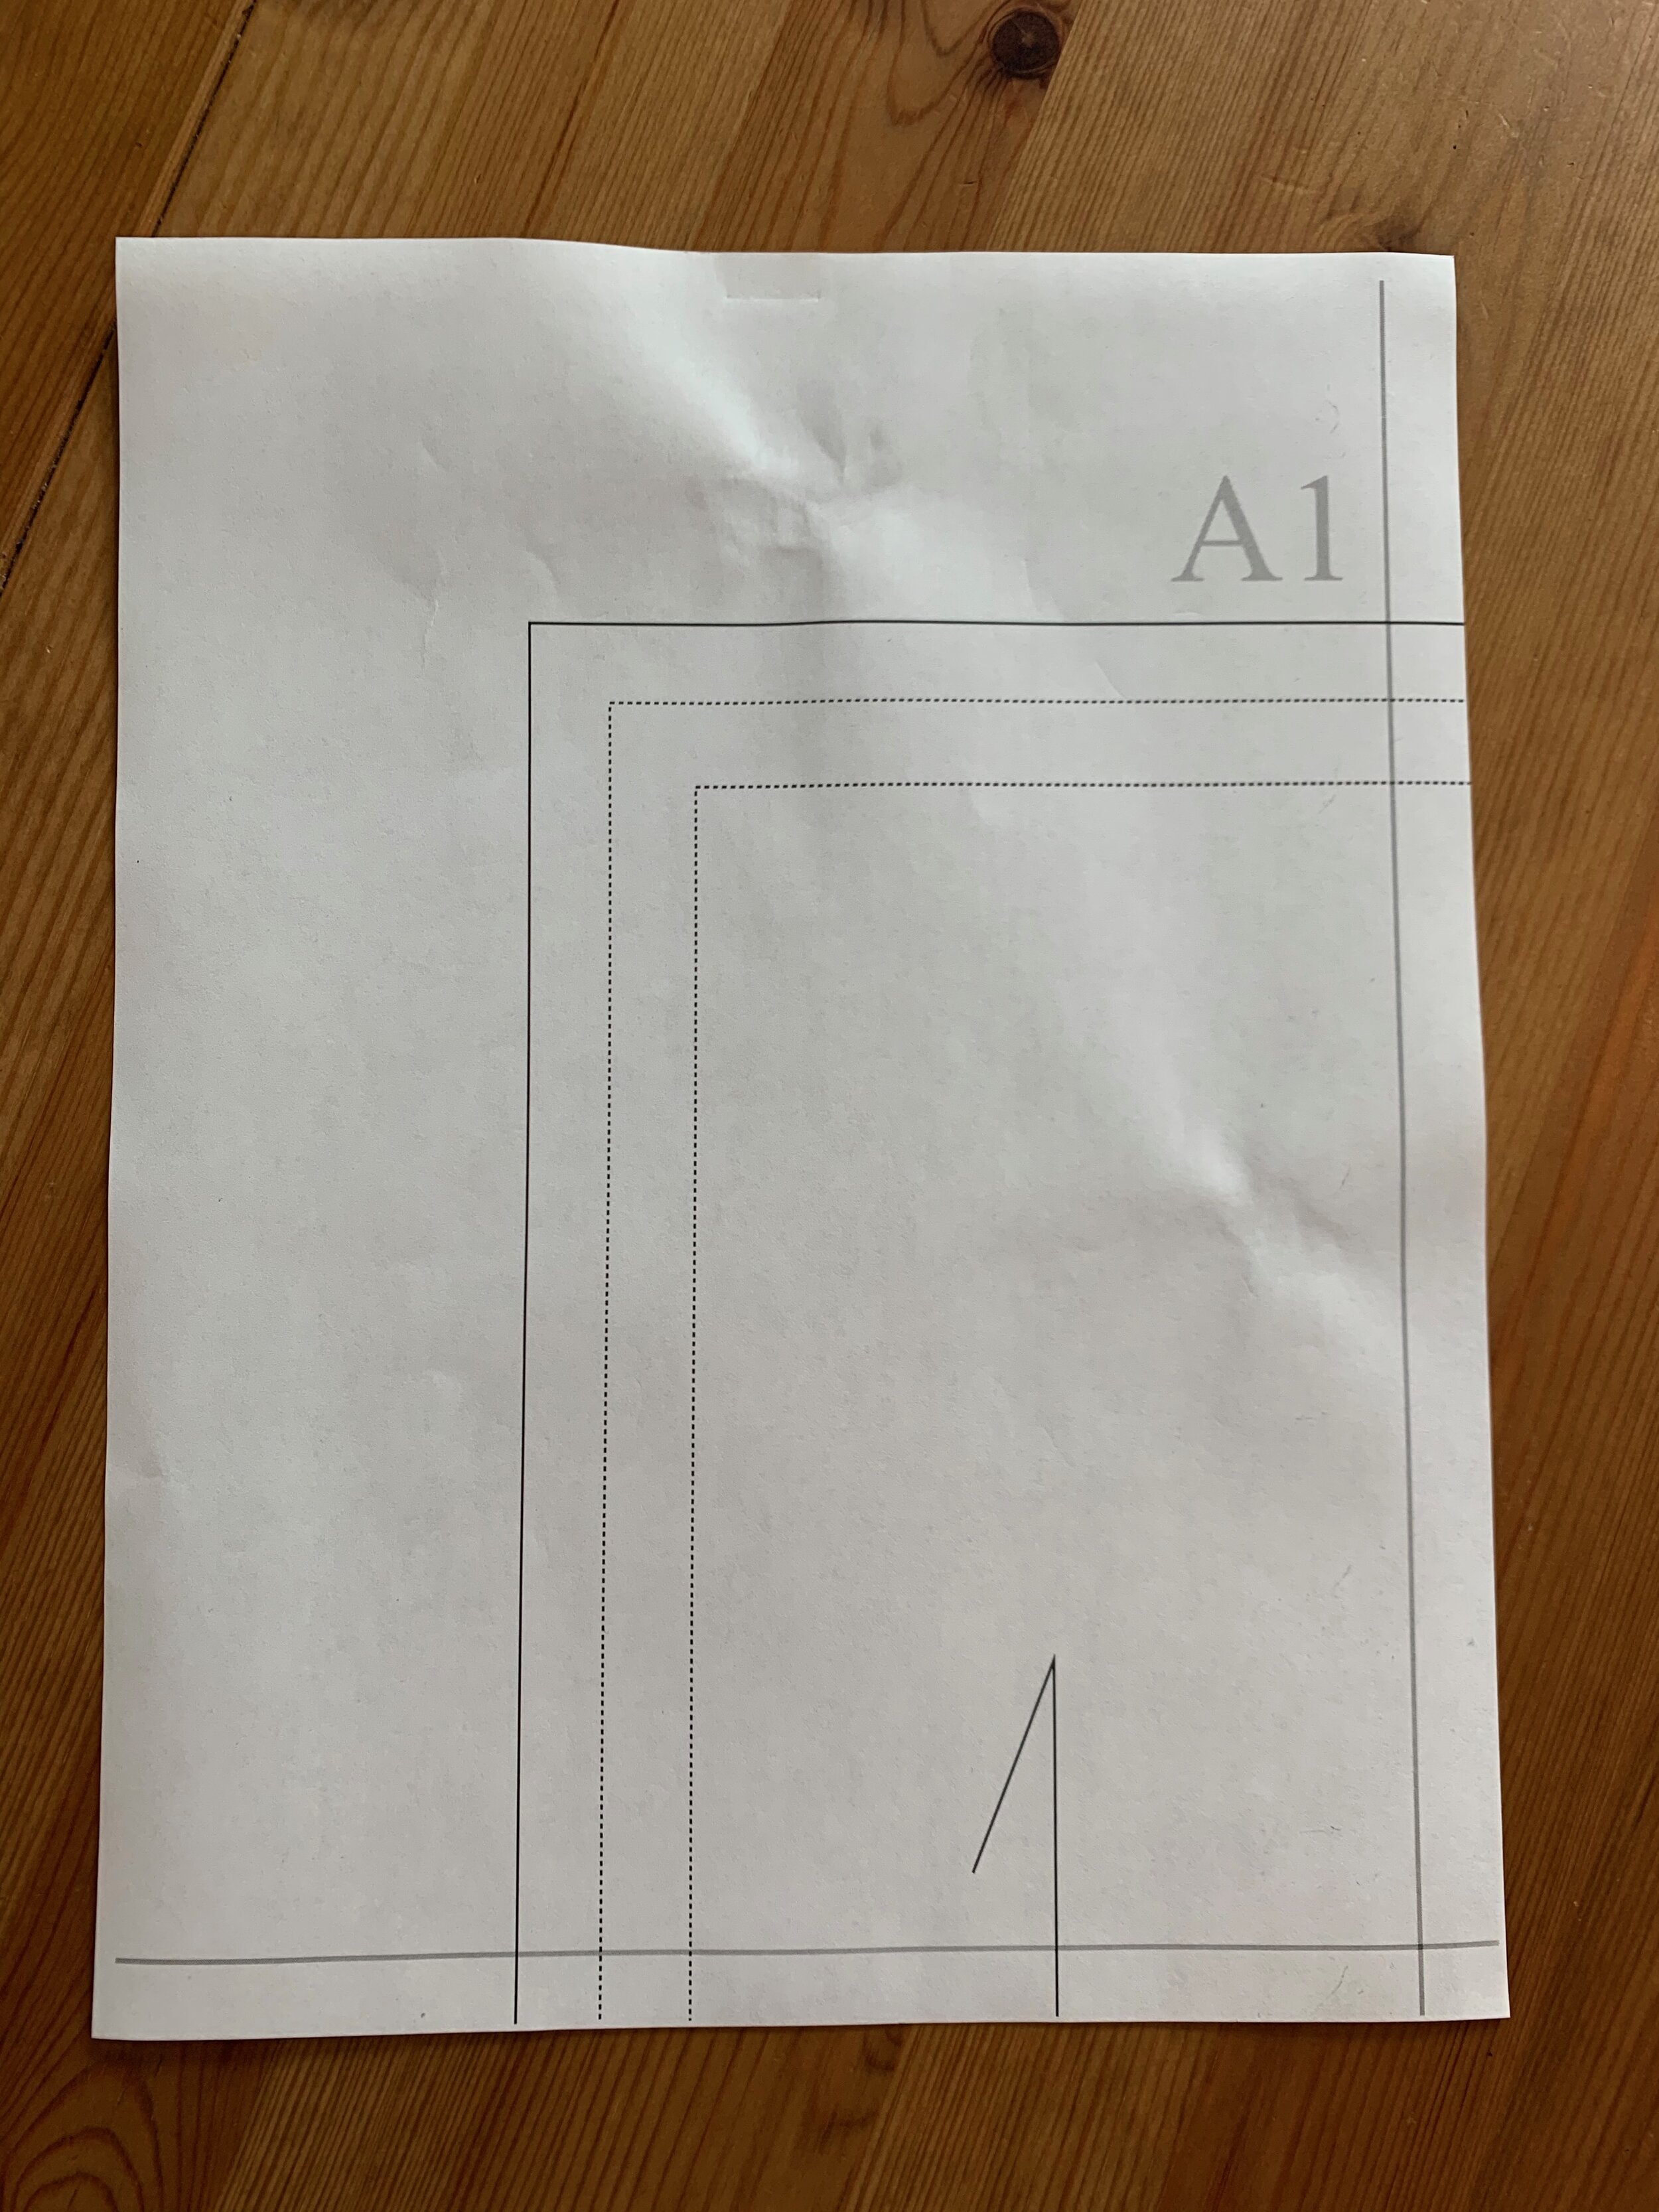
I want you to notice a few things on each page. First, you have a letter and a number. The letter refers to the row you are working on and the number refers to the column. Letters across and numbers up and down. Second, you will see a line to the right of the page 1/2” from the edge and a line on the bottom of the page 1/2” from the edge. These are your alignment lines. You will place your next page over that edge so it touches the alignment line both across and up and down. Look at the pic on the left. A1 has grey lines. In the pic on the right A2 covers the edge to the line as does B1 below it.

The pattern featured is our New Basic #1 Tea Towel pattern. There are as many sheets per row as there are per column - 3 sheets across and 3 sheets down. But each pattern is different. When you print a pattern that is wider or longer, assemble first the row or column that is smallest. Lay out your pattern pieces before assembling them so you can see the whole design. Say your pattern is 6 sheets across and 3 sheets down. Tape your rows together first. I find I have more control taping together the rows or columns that are smaller first. Also, when you are first putting your pattern together, tape your pieces lightly. Once you have seen the whole pattern and are happy that it is in line, tape it more securely. Often you need to adjust it as you go along.
I am really excited about all of the amazing things you will be able to make now that you can assemble any pattern with confidence. Just for fun, google ‘pdf sewing patterns’ so you can see all of the great things that are out there for you to make once you are through your six project New Basics Beginner’s Sewing Series and you have your basic skills down. I can’t wait to see the great things you make.